
Spring will soon be here … I promise! And as soon as you can get the shovel in the ground, you can start preparing new gardens. Here are some simple steps to follow.
STEP 1 – Have a plan: It is always best to start with a plan so that you know where you are headed. Without a plan, everything becomes guess work which can cost you more money and time. Whether you have a plan created for you by a designer or you are designing your own garden, make sure that it is drawn out to scale so that it is easier to implement it later. If using graph paper, an easy scale to use is for each square to equal one foot. Take time during this planning stage to play around with the lines of the gardens. Make sure the garden you are planning flows nicely into the surrounding elements.
STEP 2 – Mark out the bed area: Following your plan, use various measurements to start marking out the lines of your gardens. Measure out certain points from the design and place a stake in the ground at those points. For curved gardens, use a garden hose to wrap around those stakes. The hose will give you a smooth curved line that you can play with until you have the right outline. Once you have the line laid out to your liking, you can mark it with spray paint or even use flour from the kitchen.
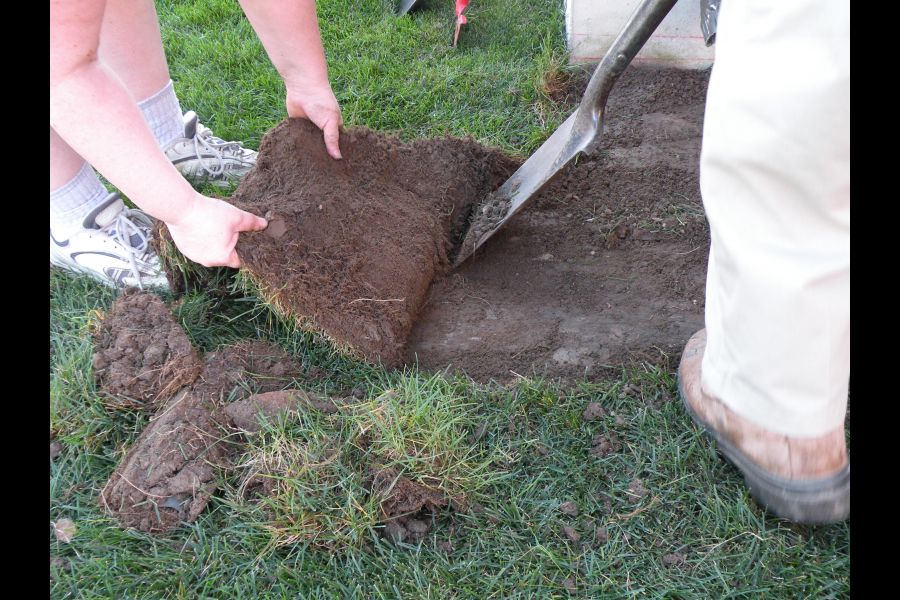
STEP 3 – Lift the sod: In many cases you need to lift the sod before preparing the soil. First, take a width of sod away at the outer edge of the bed. This will help you to define the area to be dug. Using a lawn edger or square-mouth spade, cut the sod into long strips and slide the spade underneath the sod to lift it. Usually, you will only have to remove about one inch of the soil below the sod. For larger projects, it would be best to rent a sod cutter.
STEP 4 – Prepare the soil: Once the sod is lifted, it is best to turn over the existing soil with a round-mouth shovel or a tiller. Add triple mix or composted manure on top of the bed. The soil amendments will get mixed in the bed as you plant.
STEP 5 – Place plants and other features: Now you are ready to start putting in your plants. Place and plant the larger trees or shrubs first. This makes it easier to dig larger holes without having the smaller plants sitting nearby in the way. I find it easiest to start planting from the back of the bed and work forward. Next, plant the smaller items such as the perennials and groundcovers.
When planting, dig a hole at least 1.5 to two times wider than the root ball and just a couple inches deeper. Put amended soil in the bottom of the hole to the point where the top of the root ball is flush to the finished soil level in the bed. Take the plant out of its container and loosen up the root ball with your fingers or pruners. Place the root ball into the hole and fill in around the root with amended soil, packing fresh soil around the root ball. Do not place additional soil over the top of the root ball.
STEP 6 – Edge the garden: To get a nice sharp-looking edge on the garden and to stop the lawn from growing back into the bed quickly, use an edger. Make a straight vertical cut at the grass edge and slowly mound soil toward the gardens. A well-edged bed will set any garden apart. If you would like to put in a more permanent edge you may want to consider black plastic edging, aluminum edging, retaining wall or bricks.
STEP 7 – Mulch: Mulching the gardens once the planting is done is the best way to keep weeds from coming up. It also helps to keep the sun from hitting the soil directly and drying it out. A two-inch layer of mulch is recommended. I prefer to use the finer shredded mulches as opposed to larger pieces of bark – usually available in cedar, pine or hemlock. Make sure you use less mulch around the base of any of your plants.
Joanne Young is a Niagara-on-the-Lake garden expert and coach. See her website at joanneyoung.ca.