
If you are like me, you probably have a favourite garden spade that you have been using for years, or maybe favourite pruners that you just couldn’t do without.
If you are not like me, you are probably thinking that I need to get out more often.
Today, as I was gardening, I got thinking about how old my secateurs (pruning shears) are and realized that I have had them for just over 30 years.
I believe that I also have had my shovel for at least 25 years. My dad always told me to, “Buy good and buy once.” If you buy tools of good quality, you do not have to keep replacing them every year or two. So, the saying, or my interpretation of that saying, “There is no tool like an old tool,” is true.
The trick is how to keep your gardening tools in good working order. As we wait for the leaves to fall from the trees and start packing things away in the shed or garage, why not take a couple minutes and clean up your garden tools properly.
Shovels, rakes, hoes and garden forks: The first step in cleaning up your shovels, rakes, hoes and garden forks is to use the hose to wash off all of the dirt remaining on them.
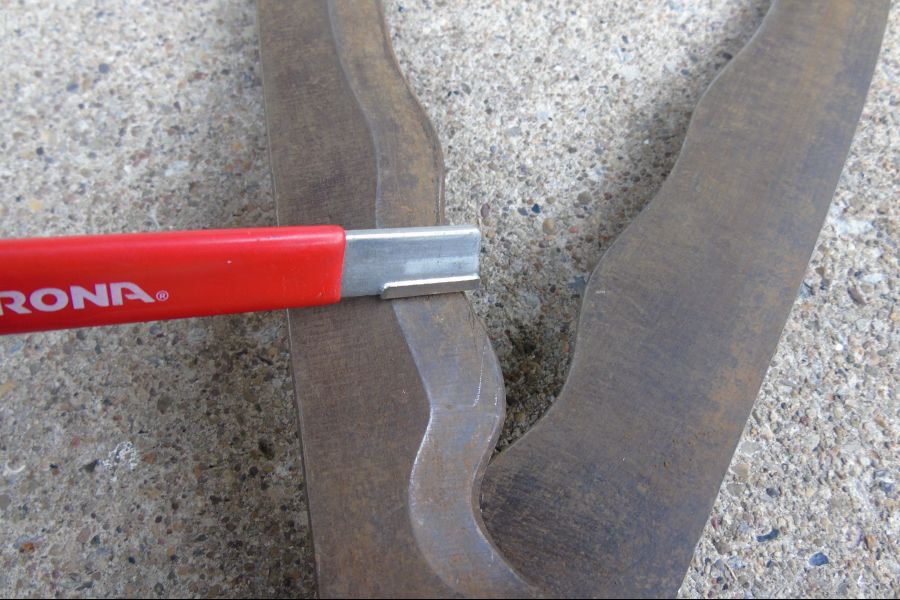
If they are still dirty after rinsing them off, you may need to use a stiff bristle brush for a more thorough scrubbing. This is also a great time to sharpen the shovels and hoes. You can use either a file, wet stone or a sharpening tool like the ones used for pruners. Putting a good edge on shovels or hoes will mean not having to work harder in the spring.
To keep the tools from rusting over winter, take a large pot or pail and fill it with sand. Add about 1 cup of vegetable oil to the sand and mix them together.
Then insert the shovel, rake or hoe and the sand/oil mixture which will coat the metal part of the tools. Pull the tools out of the sand and leave this mixture on them over winter. It will stop rust from forming.
If the wooden handles are feeling rough, causing blistered hands, take a piece of sandpaper and rub it up and down the handle several times to smooth it out. To help the wood from drying out over the years, you can also put some linseed oil on a cloth and rub it into the handle.
Shears, secateurs and loppers: Again, with your pruners, make sure that you wash off any soil. Use steel wool to remove the sap from the blades.
If the blades have become rusty over time, there is an easy way to take off the rust. Simply put some distilled white vinegar into a spray bottle and spray the blades of your pruners.
Then wrap the blades in paper towels and spray again until the towels are soaked. Leave the pruners sit for two hours, with the paper towels still wrapped around them.
Then remove the paper towels. Using a sanding block or a piece of steel wool, scrub back and forth and the rust should come right off. I have also heard that Scrubbing Bubbles toilet cleaner works well for removing rust.
Now that the blades and handles are all spruced up, it is a good time to sharpen them up. There are many different sharpeners available to purchase.
For bypass pruners, where the two blades bypass each other, the blades are always bevelled on the outer-facing edge. Always sharpen the bevelled edge and never the flat, inward-facing edge.
Once the blades are sharpened, use machine oil (like 3 in 1 Oil) and lubricate all the working parts of the pruners (spring, bolts, screws, etc). Your pruners are now ready to be stored for winter.
After you have mowed your lawn for the final time this season, why not take a few minutes to clean up the blades before putting away the mower. Use a file to remove all of the dried grass cuttings from the blades and the underside of the machine.
And just like that, your tools are now ready for winter.
Joanne Young is a Niagara-on-the-Lake garden expert and coach. See her website at joanneyoung.ca.